It may come as a surprise, but there is no definitive “best” quadcopter out there. The concept of a single model being the absolute best is simply an illusion. Just like magic, it disappears! Instead, the key is to find a drone that aligns with your desired features, suits your skill level, and fits within your budget.
Personally, I began my journey with inexpensive micro quadcopters, honing my skills in the comfort of my living room. Over time, I gradually progressed to more advanced drones, gaining knowledge about various features and the skill level required to fly different models. Leveraging this experience, I have compiled an extensive list of the best drones categorized for novice, intermediate, and professional flyers. This comprehensive guide will help you find a drone that matches your level of expertise.
While you might think you can handle a high-end drone like the Phantom as your first quadcopter, I can assure you that it could be a harsh reality check. Believe me, I’ve had my fair share of crashes and mishaps, and I wouldn’t want you to go through the same experience. Save yourself some money and start with a drone that is not only affordable but also easy to fly.
Remember, it’s all about finding the right drone that suits your needs, abilities, and budget. Happy flying!
What’s the Best Drone for You?
If you do happen to be a newbie in the drone world, chances are you’re not going to be ready for an FPV quadcopter. Instead, the best quadcopter for beginners is one that you’ll be able to part with when it’s lost or destroyed, while also not being too expensive to fix or replace.
Someone with a little experience under their belt on the other hand will want a model that is more heavy duty. Features such as an HD camera, FPV, and return to home are usually expected as well. Then you have advanced fliers, these professionals will want a model that comes with a gimbal, GPS, and a camera capable of taking professional aerial video and photography.
In order to make your life simple, below I’ve reviewed what I’ve found to be the best quadcopters for each skill level. These quadcopter reviews will ensure you get a much better drone than simply buying a random one at the store.
Best Quadcopter Review
When reading our quadcopter reviews, remember to use good judgment when deciding which model to go with. I know it can be tempting to get the best quadcopter you can afford, but if you aren’t experienced enough, it may just end up being a giant waste of money. Remember, there’s absolutely nothing is wrong with getting a mini quadcopter for your first purchase if you’ve never flown before. In fact, I would even recommend it.
NOTE: I do not own all of these quadcopters, quite frankly, I’m not that rich. However, I’ve flown all of them on multiple occasions thanks to the RC groups that I participate in. Check your local area to see if you have any group meet ups, or better yet, make your own! Getting the chance to actually fly the quad in person is much better than simply reading quadcopter reviews online.
Beginners
Estes 4606 Proto X Nano
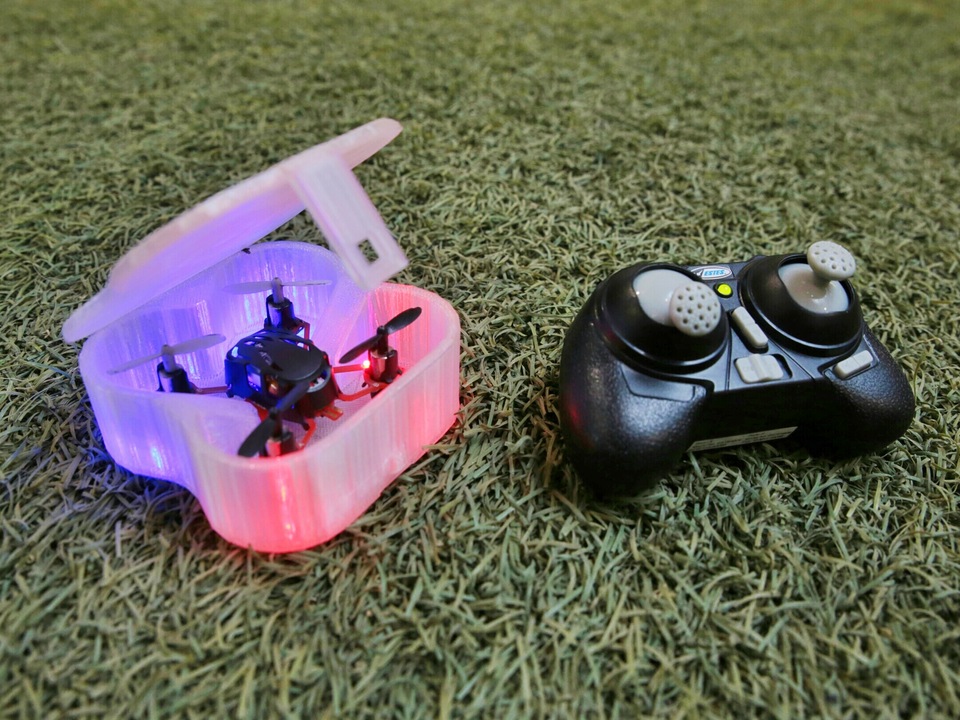
The Estes 4606 Proto X Nano might just be the smallest quadcopter on the market, but don’t let its size fool you. This mini drone manages to fly better than many more expensive models, while not even costing what it takes to fill up a tank of gas.
Part of the reason the Proto X Nano flies so well is thanks to the internal gyroscope that aids in keeping the drone stable. Because of the quads stability, you can easily control and maneuver it while flying inside. Though you may want to avoid flying outdoors as one strong gust of wind can easily cause it to be carried away. More than likely into a tree or concrete..
To make flying even easier, the Proto X has built-in LED’s to help you distinguish the front from the back. Of course, like many other models, blue lights are attached on the front of the quad while red lights signify the back.
When you couple the Proto X’s micro size with the bright LED’s, you get the perfect drone to fly at night while waiting to fall asleep. While some may say it’s a little crazy to bring a drone to bed, I call it dedication to the hobby. So even if you’re a huge quadcopter enthusiast, you should still consider getting a Proto X Nano.
If you still find yourself indecisive, just take a look at the countless quadcopter reviews on Amazon.
Syma X5SW

As of lately, a lot of companies have begun releasing entry level drones with cameras. Some models though, such as the Syma X5SW, have even gone as far as adding the capability to use FPV through WiFi.
This is a great leap forward for new flyers as it’s now possible to practice using FPV before upgrading to a more expensive model. While the X5SW’s FPV capabilities might not be the best, they at least function well enough for you to actually use it. A little lag is just to be expected.
Being able to stream live video from the X5SW doesn’t come without its downsides though. Since there is no MicroSD card slot on this drone as there is with previous models, you’re stuck to only being able to see the lower quality video feed from the FPV. This is a shame as it means there is no raw footage for you to access from the camera.
So yeah the FPV functionality might come with its few flaws, but it’s hard to complain for the price. Unlike most other affordable drones, the Syma X5SW is extremely quick and nimble, making it a ton of fun to fly. The 6-axis gyro also works exceptionally well in helping the quadcopter to remain stable during flight. Though too much wind will easily overpower it if you’re flying outdoors.
To make flying even more fun, try detaching the prop guards, camera, and landing gear. This will cause the drone to be much lighter giving the X5SW a sportier feel. As far as range goes, you can expect anywhere around seventy yards with the FPV on, and around hundred yards or so with the camera and FPV unplugged. If you try to fly too far with FPV on you might start to experience loss of connection, causing you to lose control.
The last cool aspect of the Syma X5SW that I want to mention is the headless mode. What headless mode does is make it so that you can control the drone relative to your position. So wherever you point the throttle, the drone will move that direction relative to where the transmitter is facing. This is great for new flyers as it takes another step out of the learning process. Though it’s still recommended that you learn to fly without it to make filming easier.
Sky Viper S670 Stunt Drone
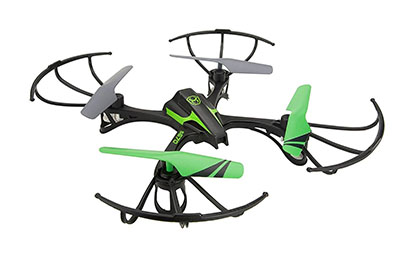
Now if you’re looking for a quadcopter that is a ton of fun to fly, you surely won’t be disappointed with the Sky Viper S670 Stunt Drone by SkyRocket. This is one of the best quads to bring out when you just want to have fun and pull off some fancy aerial acrobatics in the backyard. The S670 can also be flown indoors as well thanks to the prop guards and compact stature of the drone, just be careful though as it can pick up speed fairly quickly.
So quick in fact that it can easily reach a top speed of up to 16 mph. That’s why we recommend that you fly in an open field first in order to get the hang of everything. With a little experience under your belt you’ll be surprised at all the cool flips, rolls, dives, and funnels you can do – and if you ever find yourself wanting to impress someone, just go full speed and pull off a barrel roll. You’ll be sure to gain some cool points for that one.
With the 2.4 GHZ transmitter that comes included you can even adjust the flight sensitivity depending on how aggressive you want to fly. If you’re new to flying, or wanting to fly indoors, slide the sensitivity button to one. Move up to level 2 only once you get down the controls a little bit, or if you’re ever flying in a compact area outside and don’t want to fly too crazy. If you got a lot of open room though and want to push the drone to its limits, move all the way up to sensitivity level 3. At maximum sensitivity is definitely when the S670 is the most fun to fly, but also when you’re most likely to crash.
Luckily for us the frame is made out of a resilient polypropylene. This form of plastic is extremely tough and flexible, making it highly unlikely to break from your average crash. The only real downside to flying aggressively is that its short battery life will drain even faster. With how I fly, I only average about four to five minutes before the battery dies out. The only reason that I don’t overly mind is because it only takes around 20 – 25 minutes to fully recharge so you can get back to flying. This recharge rate is much faster than most quadcopters you’ll find on the market today.
Intermediate
UDI U818A HD+ Discovery
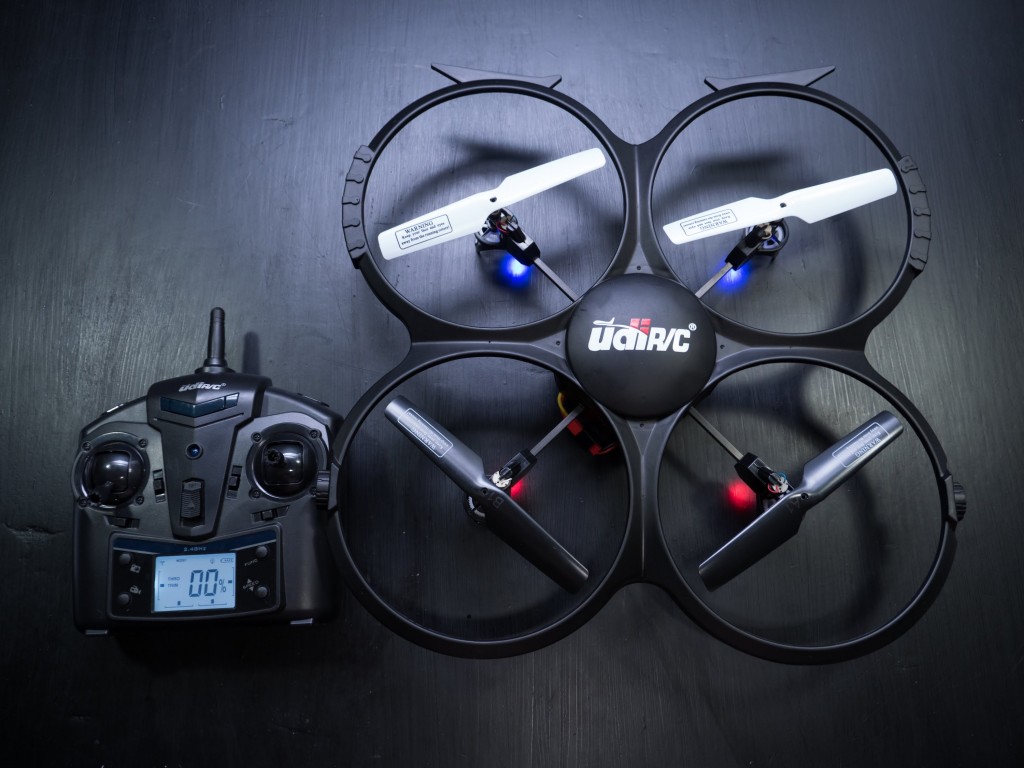
Finally, a drone with a decent HD camera that’s affordable enough for most first time flyers. While it may only take 2mp pictures and record video in 720p, that’s more than enough for anyone who just wants to fly for fun.
While most enthusiasts would still consider this to be a beginner model, it does come with a couple features that makes it a tad bit better than your typical mini drone. These two features are the headless mode and the RTH (return to home) function. Since you already know what headless mode is, we’ll move on to discussing the return home function.
Well, as you’ve probably guessed it, using the RTH feature essentially force your drone to come home. Though, since the U818A HD+ doesn’t use GPS, it only moves towards the direction of the transmitter. Even though the quad can only fly out around 200 – 300 feet, I suppose this feature could still prove itself useful if the drone started acting up.
To use the return home function, simply switch your drone to headless mode and then press the function button. The U818A HD+ will then start heading towards the transmitter on your remote, in order to stop it just move a throttle in any direction. Be warned though, this feature doesn’t always work as it’s supposed too.
Overall though, the UDI U818A HD+ is one of the top drones for beginner and intermediate flyers alike. While it may not handle the best in heavy wind, its flexible plastic body makes it great for absorbing those inevitable crashes. I’ve also noticed that this version of the U818A seems to fly more stable and even respond better as well.
Like all other U818A models, this one too can perform 360° flips and rolls with just the push of a button. You can also choose between two different flight modes depending on your skill level, or if you’re wanting to fly indoors or outdoors.
Though unlike other U818A models, this one does come with another useful bonus – a 2200mAh power bank. This is a nifty little bonus as it gives you the ability to charge your two LiPo batteries while on the go. If you like to go camping, or often find yourself away from an outlet, this is a must-have.
Parrot A.R. Drone 2.0 Power Edition
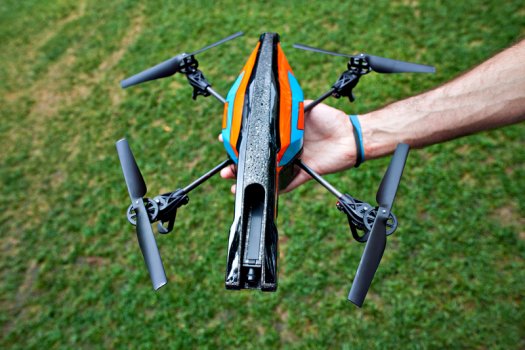
There are many cool perks of this drone that makes it the best quadcopter if you’re kind of in between skill levels. First off, the AR Drone 2.0 is different from most quads as it’s flown by using either a smart phone or tablet via the AR FreeFlight 2.0 App. This app allows you to watch the FPV of your camera and control the drone by tilting it in the direction you want it to fly. This can either be seen as either a good or bad feature depending on how you look at it.
It can be seen as a good feature as it gives the flight experience a fun unique twist compared to that of using a normal transmitter. The downside of not having a controller though is that it may be a little harder for you to adjust to using one if you plan on eventually upgrading to a more expensive model. Luckily, Parrot added a feature called Joypad Mode so you can fly by using virtual joysticks instead of tilting your device. While it may not be quite the same as flying with an actual controller, it’s close enough for you to get the feel of it.
The FreeFlight 2.0 app also allows you to do everything from adjusting the altitude, speed, and tilt angle max, to performing auto takeoff and landing. You can even enable Absolute Control (headless mode) to make flying easier when first starting out.
Now if you’re looking for a drone to take professional video or photography, this isn’t the right model for you. The camera on this drone can only record video in 720p, and with no gimbal attached the footage is far from smooth. That’s why the AR Drone 2.0 is better suited for people who just want to fly a FPV quadcopter for fun.
So if you’re looking to get a quadcopter for your kids, this is a good one to consider. Not only will they have a ton of fun flying the drone, but also playing the augmented reality (AR) games that come included in the app. With the Power Edition you’ll even get up to 36 minutes of flight time from the two 1500 mAh LiPo batteries included, giving you plenty of time to fly before having to go back and recharge.
As far as range goes, you can expect around 60 yards before the drones built-in WiFi starts to fade away. I wish they could have done a better job here, but I guess if you are still somewhat new to flying you might not be ready for flying long range yet anyways. Overall though I’m extremely impressed with the Parrot AR Drone 2.0 and would recommend it to anyone looking for one of the best quadcopters that both fun yet affordable.
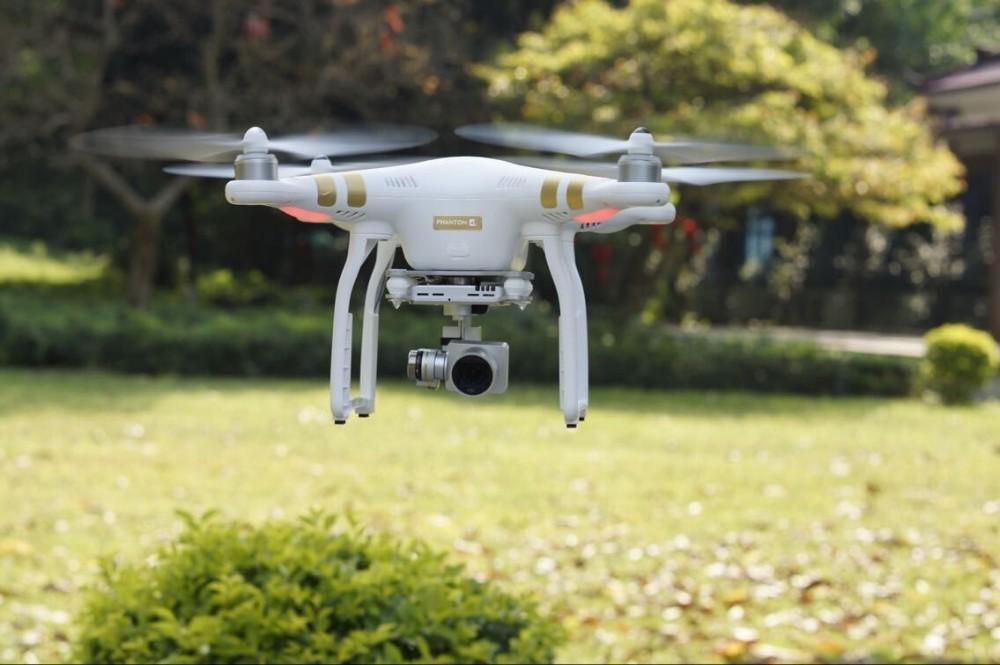
DJI Phantom 3 Standard
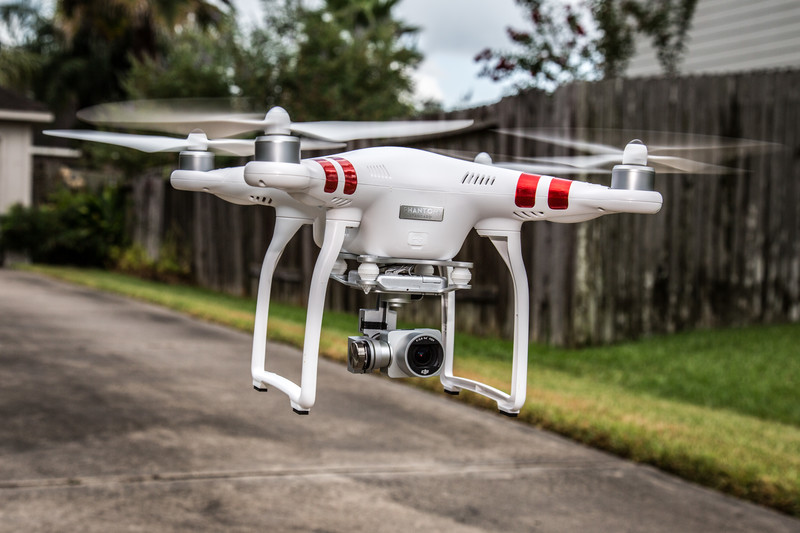
While I wouldn’t normally consider the DJI Phantom 3 an intermediate level drone, DJI has made the standard model affordable enough to barely make the cut. However, I wouldn’t recommend going straight from a mini drone to something of this caliber. Even though the Phantom 3 is extremely easy to fly, you would be better off having more experience under your belt with something like the UDI U818A.
Initially, I was going to recommend a cheaper quadcopter, but frankly if you’re willing to spend anything in the $400 – $600 range, you’re better off saving up for the Phantom 3. All of the other drones in that price range simply can’t compare to capabilities of DJI’s new Phantom.
For starters, this model comes equipped with a camera that can record video in 2.7k HD and take pictures in 12mp. While this is pretty great quality, what really should make you happy is the new f/2.8 lens with a 94⁰field of view. What makes this lens so great is that there is no more unwanted distortion, or in other words no more fisheye effect. This is awesome because not only does the video quality look better, you can also easily upload it online without a ton of boring editing.
With the new DJI GO app you can even watch the footage live as you’re flying in 720p. This app can also be used to change your camera settings, perform auto takeoff and landing, edit and share your videos, as well as perform many other impressive tasks.
One task that I’ve found to be quite useful is the new interactive flight simulator. This feature is great when first starting out as it allows you to practice flying in a safe virtual environment.
While flying the Phantom 3 is honestly fairly easy, you should be warned it’s slightly more complicated to take pictures using the standard model’s remote controller. This is only because DJI left out all the fancy buttons for recording and taking pictures on the standard remote.
This leaves you having to do everything on your smart phone or tablet, which can be inefficient if you’re wanting to take professional video or aerial photography. If so, you may want to save up for either the advanced or the professional model. No matter which version you buy, if you get the DJI Phantom 3 you’ll have one of the best quadcopters that money can buy.
Professional
DJI Phantom 3 Professional
 When many people begin flying drones, they dream of the day that they’ll own a Phantom and take rule over the skies. Whether they’ve watched some videos of the Phantom online, or maybe even seen one flown at a concert – they just knew they had to have one.
Sadly enough there is a problem that most people end up facing in their conquest of getting the Phantom 3. This worrisome problem is whether to get the standard, advanced, or professional model.
Okay, maybe it’s not so big of a problem; but if you’re planning on getting the Phantom 3 then it’s one you’ll have to face.
Essentially, the Phantom 3 Advanced and Professional are internally exactly the same. The only notable difference is that the professional model comes with a camera that shoots video in 4k UHD.
So, if you’re anything like me and want the best quadcopter possible for aerial imaging, go with the professional model. If you don’t care about the 4k camera though then just go with the advanced.
No matter which model you choose, you’ll still get all of the same beneficial features besides the camera. The most important feature having to be the now built-in DJI Lightbridge system. This system effectively increases the range of your live video feed up to 15,000+ feet out while simultaneously connecting you with GLONASS satellite positioning.
The extra satellites really help with improving flight stabilization and making sure the drone is where it needs to be at all times. This improved flight stabilization coupled with the 3-axis gimbal results in aerial video footage like you’ve never seen before.
If you’re lucky enough to ever get the chance to fly a Phantom 3 Advanced or Professional, one of the first things you’ll notice is a light clicking noise after you turn it on. This clicking is actually known as the Vision Positioning system. DJI implemented the VPS to help with flying close to the ground and indoors without the aid of GPS. Essentially DJI installed an optical camera and ultrasonic sensors that scan the ground underneath the drone when you reach around 10ft off the ground.
Even though DJI says the Vision Position technology helps with flying indoors, I still wouldn’t recommend it in close quarter environments. In a large enough room such as a warehouse or concert venue though you should be good to go.
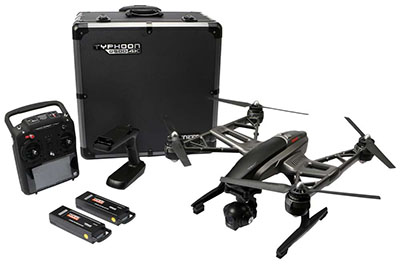
Yuneec Typhoon Q500 4K
Another great drone that is steadily gaining popularity is the Yuneec Typhoon Q500 4K. While I wouldn’t quite compare it to the Phantom 3, it does come with a few benefits that some may prefer.
For starters, included with the Yuneec Q500 is their handheld Steadygrip system that holds the CGO3 camera with the 3-axis gimbal. With this device all you have to do is attach your smart phone on top and you now have the ability to record seamlessly smooth 4K UHD footage right from the palm of your hands. This is a great addition for anyone who wants to take footage while on the ground without all the shakiness you would normally expect. This would have been amazing back in my skateboard days..
The next big advantage of the Yuneec Q500 is the ST10+ personal ground station. What’s so nice about this all-in-one controller comes is that it comes with a 5.5 inch Android tablet. This is awesome news because it eliminates the need of having to buy an extra one just to use with your drone. Since the quad itself already cost so much, the built-in tablet is definitely a nice bonus.
Another “unique” bonus with the Typhoon Q500 is that you can watch the footage back in slow motion. All you have to do is record the footage in 1080p at a high FPS, then go back after and slow the footage down. This is extremely useful when making some cool videos.
When comparing the footage from the Phantom 3 and the Q500 4K though you will notice that the colors from the Phantom are much more vibrant. Also I prefer the 20mm lens on the Phantom as it makes the footage not as blurry around the edges. Though the lens on the CGO3 camera is a little wider so I guess some people may like it better.
Where the Typhoon Q500 could really use some help though is in the speed category. While it can reach a top speed of around 40+ mph without GPS, with GPS it can only go around 15mph at most. When you’re used to flying a Phantom 3 which can reach a top speed of around 30+ mph, this can seem a little slow.
Since we’re on the topic of speed though I do have to admit that the Yuneec customer service is much better than DJI’s. This alone might just be the biggest reason to go with Yuneec as they’re much more pleasant to deal with if you run into problems.
Which in the drone world is highly likely to happen.
DJI Inspire 1
 It’s a bird, it’s a plane, no it’s the most expensive drone on the market – the DJI Inspire 1! Haha, with all jokes aside, if you’re looking to get the best quadcopter with a camera that money can buy, short of building your own, then the Inspire 1 is what you want.
This drone makes capturing amazing aerial footage more simplistic than ever before. While the camera is essentially the same as the Phantom 3, the Inspire 1 does have a lot of added perks that set the two drones apart.
If you’re used to flying the Phantom series, as well as many other quadcopters, then you’re all too familiar with the propellers and landing gear sneaking its way into your footage. It’s so annoying trying to perfectly angle the camera to avoid seeing them, and when they do show up, it usually ruins the video.
DJI avoids this with the Inspire 1 by giving it retractable landing gear that moves up while you’re flying. You can either press the auto take off button while you’re on the ground and it will do it for you automatically, or press the transformation button while you’re in the air and it will do it on command. Once the landing gear is finally up though you no longer have to worry about any part of the drone coming into view of the camera.
This revolutionary design made it possible for the Inspire 1 to have a camera that can turn and film in 360°. While it may take some skill to fly the drone around and fully utilize the potential of the camera, you could always buy the upgraded package with two controllers and have someone fly or control the camera for you.
Having the ability to control the camera while someone else is flying really brings me back to the days of doing airstrike missions on Call of Duty. Besides simply making the flight experience more entertaining, the dual operator feature also makes capturing the perfect footage or picture easier than ever before.
For the most part, the Inspire 1 is a lot like the Phantom 3, just improved in many ways. One of the first differences you’ll notice is that the Inspire is much faster than the Phantom. While the Inspire can reach top speeds of up to 45+mph, the Phantom 3 can only go about 35mph.
Another advantage the Inspire has is better Vision Positioning technology. This is the technology that allows the DJI drones to fly indoors and without access to GPS satellites. With the Inspire you can actually detect the ground up to a range of 16ft below, which is slightly better than the Phantom 3 at only 10ft.
You can also upgrade the camera at any time thanks to the detachable gimbal. This comes really useful if you ever want to change or upgrade your camera, or if you want to use the DJI OSMO.
There is one area where the Phantom 3 does outperform the Inspire 1 though and that is in range. Using the Lightbridge technology I can manage to watch the live feed with the Phantom 3 at a range of over 15,000ft. However using the Inspire 1 I can only watch the live feed at a range of over 13,000ft. Though compared to the Yuneec Typhoon Q500 4K which only has a live feed range of about 2,000ft, both DJI quadcopters seem pretty impressive.
Important Tips for New Fliers
Even today I can still remember the excitement of getting my first micro drone. When the package finally arrived at my door I couldn’t have been more ready to fly for the first time. In record time I opened the package, read the instructions, charged the battery, and went to set up for my first flight in the living room.
It wasn’t until about five seconds after I took off from my makeshift table landing pad that I quickly came to the realization that flying quadcopters was going to be harder than I thought. From watching videos online it seemed as if it was going to be easy, but it was quickly obvious that there was a bit of a learning curve.
In order to properly prepare yourself for your first flight make sure to take the time to read the instruction manual thoroughly. It will teach you how to do everything you need to know such as how to calibrate your drone, adjust your trim, and even how to download photos and videos on to your computer from your camera.
Once you have learned how your quadcopter works and are ready to take your first flight, make sure to find an open area to do so in. When you’re first learning how to control a drone you’ll find that it is hard to make it do exactly what you want. Luckily all of the drones I’ve reviewed are very robust and won’t break easily when you do inevitably crash.
Now that you’ve taken the time to read our quadcopter reviews, as well as our tips, you should be well on your way to getting the best quadcopter that fits your skill level and price range. Also, it’s important that you read the FAA guidelines to make sure you’re not breaking any rules when flying. After that you should be good to go, so have fun flying!
- Related post: 10 ideas for boosting your wireless router signal